Welcome to Where are motherboard screws? Your go-to guide for understanding the importance and whereabouts of these essential components in your computer build. While motherboard screws might not seem like much, they are very important for making sure your motherboard is installed securely and avoiding damage and instability.
We’ll go over the different kinds of motherboard screws, where to find them in your computer case, what tools you’ll need for the job, how-to guides for accurate installation, troubleshooting advice, and more in this extensive resource.
Table of Contents
Definition of Motherboard Screws
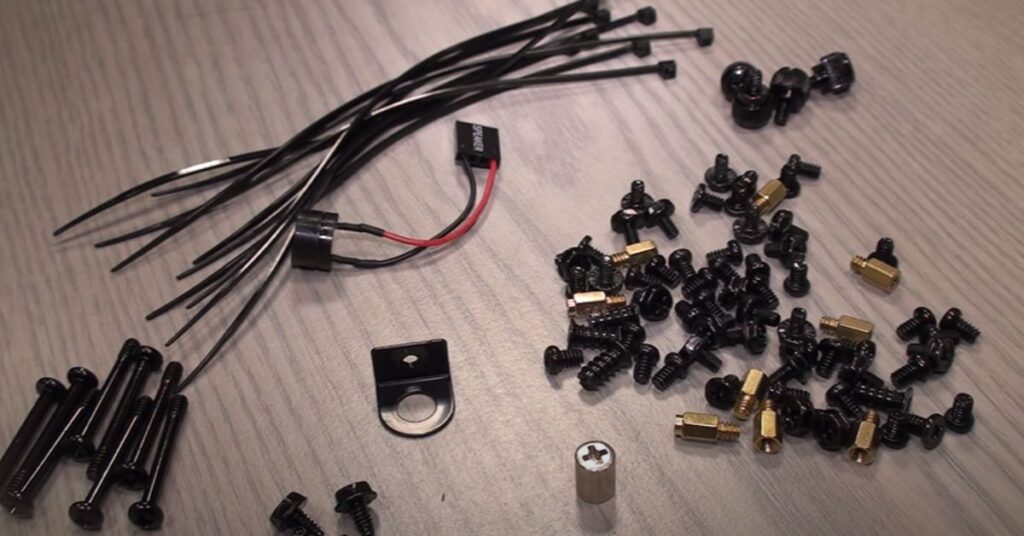
Specialized fasteners called motherboard screws are used to attach the motherboard to the computer casing. These screws are essential to preserving the motherboard’s stability and optimal operation within the system. They usually come in a variety of shapes and sizes, such as mounting screws and standoffs.
While mounting screws firmly anchor the motherboard in place, standoff screws raise the motherboard above the case to avoid electrical shorts and offer structural support. To protect the motherboard and guarantee the computer system operates dependably, motherboard screws must be installed correctly.
Purpose of Motherboard Screws
The crucial function of motherboard screws is to firmly fasten the motherboard to the computer casing. These screws secure the motherboard firmly, preventing movement and vibrations that might harm sensitive components or interfere with electrical connections.
They also assist in keeping the motherboard and other system parts like the CPU, RAM, and expansion cards properly aligned. In the end, motherboard screws serve primarily to maintain the stability and integrity of the entire computer system, enabling dependable operation and long-term dependability.
Further reading: Are Installing Motherboard Drivers Necessary?
Types of Motherboard Screws
1. Standoff Screws
Definition and Function
Standoff screws, also known as motherboard standoffs or spacers, are specialized screws designed to elevate the motherboard above the surface of the computer case. Their primary function is to create a gap between the motherboard and the case, preventing electrical contact that could cause short circuits. Standoff screws provide essential support and stability to the motherboard, ensuring that it remains securely in place without bending or flexing.
Common Sizes and Shapes
To accommodate a variety of motherboard and case configurations, standoff screws are available in a range of sizes and shapes. M3 and 6-32 threads are common sizes, and their lengths range from 5 to 12 mm. Hexagonal standoffs provide superior grip and stability during installation; round standoffs are also an option.
Furthermore, some standoffs have a male threading on both ends for direct attachment to the case, while others have a female threading on one end to accept the mounting screws. In general, case compatibility and motherboard specifications determine the size and shape of the standoff.
2. Mounting Screws
Definition and Function
Threaded fasteners called mounting screws are used to firmly fasten the motherboard to standoffs that are fixed inside the computer casing. With the help of these screws, you can be sure that the motherboard won’t move or shift while it’s operating. Mounting screws aid in preserving correct alignment between the motherboard and other system parts, including the CPU, RAM, and expansion cards, by fastening the motherboard to the standoffs. This guarantees dependable electrical connections and the computer system operating at peak efficiency.
Common Sizes and Varieties
Mounting screws typically come in standardized sizes and thread types to ensure compatibility with various motherboard and case configurations. The most common thread sizes for mounting screws are M3 and 6-32. These screws may vary in length, with typical sizes ranging from 5mm to 10mm, depending on the thickness of the motherboard and the depth of the standoffs. Mounting screws may have different head types, such as flat, pan, or hexagonal heads, to accommodate different screwdriver types and provide ease of installation.
Further reading: How to check motherboard drivers?
Locations of Motherboard Screws in a Computer Case
When assembling a computer, knowing where to find motherboard screws within the case is crucial for proper installation. Here’s a breakdown of the common locations:
Standard Placement Areas
1. ATX Form Factor
- Along the edges of the motherboard, typically around the perimeter. Additional screw holes may be present near the CPU socket and PCIe slots.
2. Micro ATX Form Factor
- Similar to ATX motherboards, screws are typically found along the edges and around critical components. Due to the smaller size, there may be fewer screw holes compared to ATX.
3. Mini ITX Form Factor
- Mini ITX motherboards are compact, so screw locations are limited.
- Screws are typically located around the edges and near critical components, such as the CPU socket and RAM slots.
Additional Mounting Points
1. Optional Screw Locations:
- Enthusiast cases may offer adjustable standoff positions or alternative mounting methods, such as using adhesive standoffs or brackets.
- Custom mounting configurations provide flexibility for unconventional motherboard layouts or specialized cooling solutions.
Knowing where the motherboard screws are located within a computer case helps to guarantee the motherboard is positioned correctly and is firmly attached, preventing damage and guaranteeing dependable operation. Make sure the motherboard is positioned in relation to the standoffs, and use the right screws to ensure a tight fit.
Tools Required for Installing Motherboard Screws
The correct tools are needed for accurate and stable motherboard screw installation. The following are the necessary and extra tools you’ll need:
Essential Tools
1. Screwdriver Types
- Phillips Head Screwdriver: Most motherboard screws use Phillips head (cross-head) screws. Choose a screwdriver with a size that matches the screws on your motherboard.
- Magnetic Tip Screwdriver: A magnetic tip helps hold screws in place, making it easier to align and tighten them securely.
2. Other Necessary Equipment
- Anti-static Wrist Strap: To prevent electrostatic discharge (ESD) that can damage sensitive components, wear an anti-static wrist strap connected to a grounded surface.
- Flashlight: A flashlight can help illuminate tight spaces inside the case for better visibility when installing screws.
- Screw Tray or Magnetic Parts Tray: Use a tray to keep screws organized and prevent them from rolling away or getting lost during installation.
2. Optional Tools
1. Specialized Screwdrivers
- Hex Screwdriver: Some standoffs may have hexagonal heads instead of Phillips heads. A hex screwdriver is necessary if your case uses this type of standoff.
- Electric Screwdriver: An electric screwdriver can speed up the installation process, especially when dealing with a large number of screws. Ensure it has adjustable torque settings to prevent over-tightening.
2. Magnetic Tools
- Magnetic Screwdriver Extension: A magnetic extension can help reach screws in tight or awkward spaces within the case.
- Magnetic Pickup Tool: Useful for retrieving dropped screws or other small metal components from inside the case.
Having the right tools on hand ensures a smooth and efficient installation process for motherboard screws, resulting in a securely mounted motherboard and a stable computer system.
Further reading: Why motherboard is green?
Step-by-Step Installation Process
Follow these steps for a smooth and secure installation of motherboard screws into your computer case:
Preparing the Case
- Power off and unplug your computer from the electrical outlet.
- Place the computer case on a flat and stable surface, ensuring ample working space.
- Remove the side panel(s) of the case to access the interior.
Identifying Mounting Points
- Locate the pre-installed standoffs inside the case where the motherboard will be mounted.
- Ensure that the standoffs align with the corresponding mounting holes on the motherboard.
Installing Standoff Screws
- If necessary, install additional standoffs into the case to match the mounting holes on the motherboard.
- Screw the standoffs securely into the designated positions using a screwdriver.
Placing the Motherboard
- Carefully lower the motherboard into the case, ensuring that it aligns with the standoffs and the I/O shield lines up with the rear cutout of the case.
- Avoid forcing the motherboard into position to prevent damage to the components or the case.
Attaching the Motherboard
- Once the motherboard is correctly aligned, insert mounting screws into the screw holes on the motherboard and screw them into the standoffs.
- Start by loosely securing the screws, then gradually tighten them in a diagonal pattern to ensure even pressure.
Final Checks and Adjustments
- Double-check all mounting screws to ensure they are securely tightened but not over-tightened, which could damage the motherboard.
- Verify that the motherboard is seated properly on the standoffs and that there are no visible gaps between the motherboard and the case.
- Reattach the side panel(s) of the case, ensuring that all cables and components are properly routed and secured.
Powering On and Testing
- Once the motherboard is securely installed, reconnect all power cables, data cables, and peripherals.
- Power on the computer and verify that all components, including the motherboard, CPU, RAM, and storage devices, are functioning correctly.
- If everything is working as expected, you’ve successfully installed the motherboard screws and completed the assembly process.
You can guarantee a safe and sturdy motherboard screw installation by adhering to these detailed instructions, giving your computer system a strong base.

Troubleshooting and Common Mistakes
Even with careful installation, issues may arise when installing motherboard screws. Here are some common mistakes and troubleshooting tips:
Cross-threading Screws
- Mistake: Applying excessive force or misaligning screws can result in cross-threading, damaging the screw threads or standoffs.
- Troubleshooting: If you encounter resistance while screwing in a screw, back it out and realign it carefully. Ensure the screw threads and standoffs are clean and undamaged before retrying.
Missing or Misplaced Standoffs
- Mistake: Forgetting to install all necessary standoffs or placing them in the wrong positions can lead to instability or short circuits.
- Troubleshooting: Double-check the motherboard and case compatibility to ensure all required standoffs are installed. Remove any misplaced standoffs and reposition them correctly.
Over-tightening Screws
- Mistake: Tightening motherboard screws excessively can warp the motherboard or strip the screw holes, causing damage.
- Troubleshooting: Use a screwdriver with an appropriate torque and avoid applying excessive force. Tighten screws until snug but not overly tight to prevent damage to the motherboard or standoffs.
Incompatible Screws or Standoffs
- Mistake: Using screws or standoffs of the wrong size or type can result in improper installation and potential damage to components.
- Troubleshooting: Ensure that the screws and standoffs match the specifications recommended by the motherboard and case manufacturer. Refer to the motherboard and case documentation for compatibility guidelines.
Electrostatic Discharge (ESD) Damage
- Mistake: Failing to discharge static electricity before handling sensitive components can cause ESD damage, affecting the motherboard and other hardware.
- Troubleshooting: Use an anti-static wrist strap connected to a grounded surface or touch a grounded metal object before handling components to discharge static electricity safely.
Improper Alignment
- Mistake: Incorrectly aligning the motherboard with the standoffs or I/O shield can result in difficulty inserting screws or misalignment of components.
- Troubleshooting: Ensure the motherboard is properly aligned with the standoffs and the I/O shield lines up with the rear cutout of the case before securing screws. Make adjustments as needed to achieve proper alignment.
Final Thoughts
We’ve discussed the importance and locations of these ostensibly tiny but vital parts in computer construction in Where are motherboard screws? When it comes to securing the motherboard inside the casing and guaranteeing stability, correct alignment, and dependable system performance, motherboard screws are essential.
You can handle the complexities of motherboard screw installation with confidence if you know the kinds, locations, tools needed, step-by-step installation procedure, and typical errors. This guide enables you to carefully and precisely assemble your computer, regardless of your level of experience, providing a strong basis for a dependable and functional system.
FAQ: Where Are Motherboard Screws?
Why are motherboard screws important?
Motherboard screws are essential for securely attaching the motherboard to the computer case, preventing movement and ensuring proper alignment with other components. This stability is crucial for reliable performance and preventing damage.
Do I need to use all the motherboard screws?
It’s recommended to use all available motherboard screws to ensure proper support and stability. Missing screws can lead to uneven pressure distribution and potential damage to the motherboard.
Can I reuse motherboard screws?
It’s generally safe to reuse motherboard screws if they are in good condition and compatible with the new motherboard and case. However, it’s essential to inspect the screws for any signs of damage or wear before reuse.
How tight should I tighten motherboard screws?
Motherboard screws should be tightened until snug but not overly tight. Applying excessive force can damage the motherboard or strip the screw holes. Use a screwdriver with an appropriate torque and avoid over-tightening.
What if my motherboard doesn’t align with the standoffs in the case?
If the motherboard doesn’t align with the standoffs, double-check the compatibility between the motherboard and case. You may need to adjust the placement of standoffs or use additional standoffs to match the mounting holes on the motherboard.
Are there any risks associated with installing motherboard screws?
While installing motherboard screws is relatively straightforward, there are some risks, such as cross-threading screws, over-tightening, or ESD damage. Following proper installation techniques and precautions can help mitigate these risks and ensure a successful installation process.