Within this detailed manual on “How to connect a power supply to a motherboard,” connecting a power supply to a motherboard is a fundamental step in assembling a computer system. This crucial process ensures that the motherboard receives the necessary electrical power to drive the entire system. Understanding the correct procedure is essential for both novice and experienced PC builders.
We will walk through the step-by-step process of connecting a power supply to a motherboard, highlighting the key components and emphasizing safety measures. Whether you’re assembling a new PC or upgrading an existing one, mastering this connection is pivotal for a smooth and successful build. Additionally, we’ll explore tips and best practices to enhance your overall experience with this critical process.
Table of Contents
Other power supply connectors
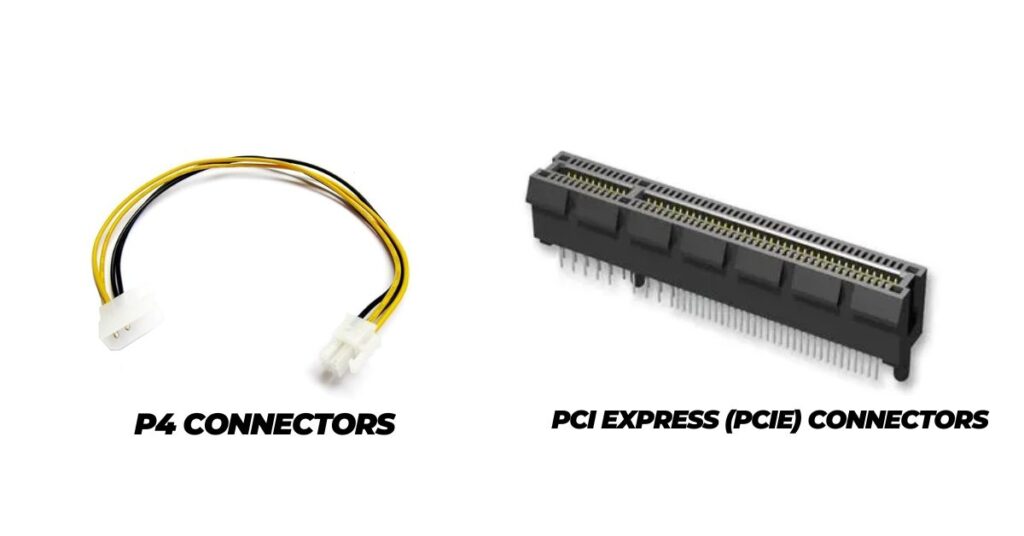
P4 Connectors:
The P4 connector, also known as the 4-pin ATX12V connector, is a supplementary power connector designed to provide additional power to the processor. This connector is crucial for stable CPU performance, especially in systems with higher power requirements. The P4 connector typically plugs into a dedicated 4-pin socket on the motherboard, ensuring the processor receives the necessary power for optimal functioning.
PCI Express (PCIe) Connectors:
PCI Express connectors, commonly referred to as PCIe connectors, are essential for supplying power to graphics cards and other expansion cards. Available in various configurations, such as 6-pin, 8-pin, or 6+2-pin, these connectors deliver the required voltage to ensure the proper operation of high-performance components.
PCIe connectors connect directly to compatible sockets on the graphics card, providing a dedicated power source for graphics processing units (GPUs) and other PCIe devices. Properly connecting these connectors is crucial for powering and enabling the full potential of advanced graphics and expansion cards in a computer system.
How are P4 and PCI-e connections different?
Connecting power to a motherboard involves various connectors, with the P4 and PCI Express (PCIe) connections serving distinct purposes within a computer system. Understanding their differences is crucial for proper installation and optimal performance.

1. Functionality:
- P4 Connector: Also known as the 4-pin ATX12V connector, the P4 connector is specifically designed to supply additional power to the processor (CPU). It ensures stable and reliable power delivery to the CPU for efficient operation, especially in systems with higher processing demands.
- PCI Express (PCIe) Connector: PCIe connectors are dedicated to providing power to expansion cards, most notably graphics cards. These connectors come in various configurations, such as 6-pin, 8-pin, or 6+2-pin, and deliver the required voltage to support the demanding power needs of high-performance components like GPUs.
2. Physical Characteristics:
- P4 Connector: The P4 connector typically consists of a 4-pin configuration and plugs into a dedicated 4-pin socket on the motherboard. It is smaller compared to PCIe connectors and is positioned near the CPU socket on the motherboard.
- PCI Express (PCIe) Connector: PCIe connectors vary in size and pin configuration. The most common variations are 6-pin and 8-pin connectors, with the latter often referred to as “6+2-pin” due to its ability to function as either a 6-pin or 8-pin connector. These connectors are larger and are located near the PCIe slots on the motherboard for graphics card installation.
3: Usage in the System:
- P4 Connector: The P4 connector focuses on powering the CPU and ensuring its smooth operation. It is a critical connection for maintaining the stability of the processor during demanding tasks and resource-intensive applications.
- PCI Express (PCIe) Connector: PCIe connectors are primarily used for supplying power to graphics cards and other expansion cards that require additional power beyond what the motherboard can provide through the PCIe slot. These connectors play a key role in supporting the advanced features and performance capabilities of modern GPUs.
Understanding the unique roles of P4 and PCIe connectors is essential for proper cable management and the successful assembly of a computer system. Careful attention to these distinctions ensures that each component receives the specific power it requires, contributing to the overall efficiency and reliability of the PC.
How TO Connect Case Fans To The Motherboard?
Read this helpful article on your computer as well.
How to connect a power supply to a motherboard – Drive connections
Connecting a power supply to a motherboard involves more than just providing power to the essential components. Drive connections play a pivotal role in ensuring that storage devices and peripherals receive the necessary power to function seamlessly. In this guide, we’ll explore the various drive connections, detailing the steps to connect them properly for a well-functioning computer system.

1:Molex Connections:
Molex connections are a traditional power supply interface commonly used to power older devices, such as hard drives and optical drives. Recognizable by their rectangular shape and multiple pins, Molex connectors plug into corresponding sockets on the devices. It’s crucial to align the connector correctly and secure it firmly to ensure a stable power supply.
2: SATA Connections:
SATA connections have become the standard for powering modern storage devices, including hard drives and SSDs. These connectors feature a slim, L-shaped design and are more straightforward to connect than Molex. Align the SATA power connector with the corresponding port on the drive and push it in until it clicks, providing a reliable power source.
3: Floppy Disk Drive:
While less common in contemporary systems, some setups may still require power for a floppy disk drive. The power connection for a floppy drive is distinctive, with a small, rectangular connector. Ensure proper alignment and secure connection to provide power to the drive if it’s part of your system.
4: Power Supply Leads:
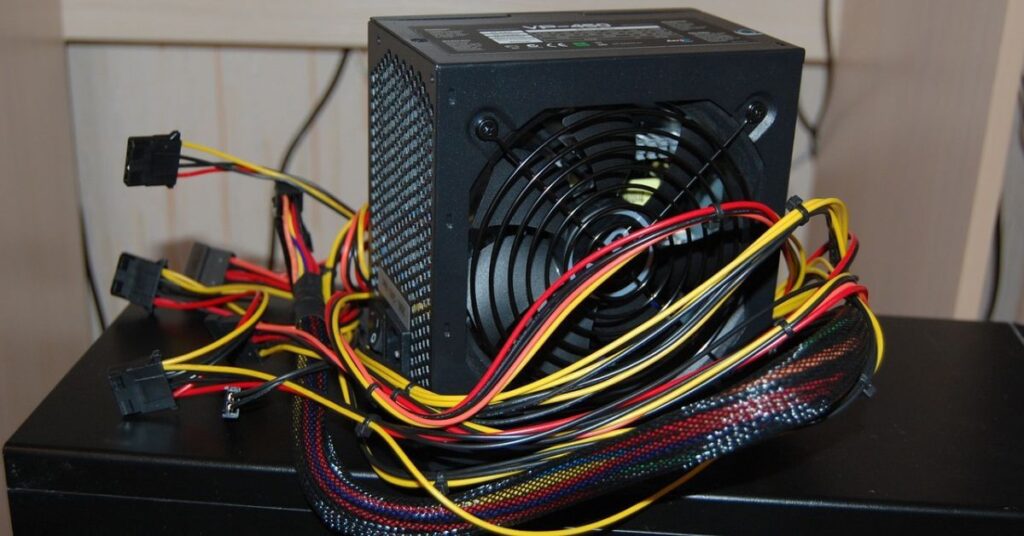
Power supply leads, also known as modular cables, offer flexibility by allowing you to connect only the necessary cables for your specific configuration. These leads come with various connectors, including SATA, Molex, and others. Connect the appropriate leads to the corresponding components, reducing cable clutter and improving airflow within the case.
5: Adapter Leads:
In certain scenarios, adapter leads may be required to bridge the gap between different types of power connectors. These adapters allow you to convert one type of connection to another, ensuring compatibility between the power supply and the devices you intend to connect. Use adapter leads judiciously, and ensure they are securely attached to prevent any power-related issues.
Connecting power to storage devices and peripherals is a critical step in the overall assembly of a computer system. By understanding the nuances of Molex, SATA, floppy disk drives, power supply leads, and adapter leads, you can ensure a reliable and efficient power supply to all components, contributing to the smooth functioning of your PC. Read this helpful article on your computer as well.
Can Motherboard Boot Without RAM?
Read this helpful article on your computer as well.
How to connect a power supply to a motherboard – Cable Management
Efficient cable management is a key aspect of assembling a computer system, impacting both aesthetics and functionality. Connecting a power supply to a motherboard involves organizing and routing cables strategically to optimize airflow, enhance cooling, and simplify future upgrades. In this guide, we’ll explore the art of cable management, providing insights into best practices for a clean and well-organized setup.

1. Bundle and Route Cables:
Begin by grouping cables based on their function, such as power supply leads, data cables, and front panel connectors. Use cable ties or Velcro straps to create neat bundles. Route cables behind the motherboard tray or through designated cable management channels in the case to minimize visibility and improve airflow.
2. Connect Only What You Need:
Avoid unnecessary clutter by connecting only the cables required for your specific components. Modular power supplies allow you to use only the necessary cables, reducing the number of unused connectors within the case. This not only enhances aesthetics but also improves airflow for better cooling.
3. Consider Cable Length:
Select the appropriate cable lengths to prevent excess slack. Excessively long cables can lead to tangling and obstruct efficient airflow. Conversely, cables that are too short may strain connections and limit placement options for components. Choose cables that provide a clean and direct path without unnecessary slack.
4. Use Cable Ties and Clips:
Secure cables in place using cable ties, clips, or Velcro straps. Keep cables neatly organized and prevent them from obstructing fans or components. Pay special attention to the placement of larger cables, such as those connected to the power supply, ensuring they don’t impede airflow or interfere with other components.
5. Route Front Panel Cables Carefully:
Front panel connectors, including USB, audio, and power button cables, should be carefully routed to avoid clutter. Thread these cables through designated routing holes in the case and connect them to the appropriate headers on the motherboard. Neatly bundle and secure these cables to maintain a clean appearance.
6. Test and Adjust:
After connecting all the cables, power on the system and check for any issues. Ensure that fans are spinning freely, and components are receiving power as intended. If necessary, make adjustments to cable routing to address any concerns and maintain optimal system functionality.
Efficient cable management not only enhances the visual appeal of your computer but also contributes to improved system performance and longevity. By following these cable management practices, you can create a well-organized and aesthetically pleasing build while ensuring optimal airflow and cooling for your components.
Is it possible to test a power supply without a motherboard present?
Yes, it is possible to test a power supply without a motherboard present. To perform a basic test, you can use a paperclip or a dedicated PSU tester to short the green wire (PS_ON) and any black wire (COM) on the 24-pin motherboard connector. This simulates the signal the motherboard sends to the power supply to turn on.
If the power supply fan starts spinning, it indicates that the power supply is functional. However, this test only checks for basic functionality and doesn’t ensure the power supply’s ability to deliver stable power under a load, which a more comprehensive test with a multimeter or dedicated tester would confirm.
Conclusion
Connecting a power supply to a motherboard is a fundamental step in building a computer, and mastering this process ensures a stable and efficient system. From the primary ATX power connector to specialized connectors for CPUs and peripheral devices, each connection plays a vital role. Molex, SATA, and other drive connections provide power to storage and additional components.
Effective cable management ensures not only a tidy appearance but also optimal airflow for cooling. Remember, testing the power supply before full assembly adds an extra layer of assurance. By following these steps, you not only power your components correctly but also contribute to the longevity and reliability of your computer system.
Frequently Asked Questions
Why is connecting the power supply to a motherboard important?
Connecting the power supply to a motherboard is crucial as it provides the necessary electrical power to the entire system. Without a proper connection, the components, including the CPU, RAM, and peripherals, won’t function.
Can I connect a power supply to a motherboard without assembling the entire system?
Yes, you can perform a basic test by connecting the power supply to the motherboard outside the case. Use a paperclip or PSU tester to ensure the power supply functions. However, a comprehensive test with the full system is recommended for complete verification.
How do I manage cables effectively when connecting a power supply to a motherboard?
Bundle and route cables strategically, use cable ties or Velcro straps to create neat bundles, and connect only the necessary cables. Consider cable length, route front panel connectors carefully, and test the system before finalizing cable management.
Can I use an adapter to convert one type of power connector to another?
Yes, adapter leads are available to convert between different power connectors. However, use them judiciously, as excessive use may lead to power-related issues. It’s recommended to connect components directly when possible.
What should I do if the power supply test indicates an issue?
If the power supply test reveals problems, double-check cable connections, ensure components are compatible, and consider consulting the power supply’s manual. If issues persist, professional assistance or a replacement may be necessary.
Why is cable management important when connecting a power supply to a motherboard?
Efficient cable management improves system aesthetics, enhances airflow, and simplifies future upgrades. It reduces cable clutter, prevents obstruction of fans and components, and contributes to a clean and organized build.
